
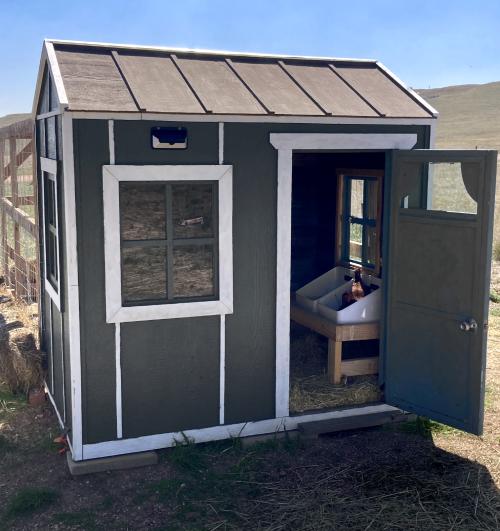

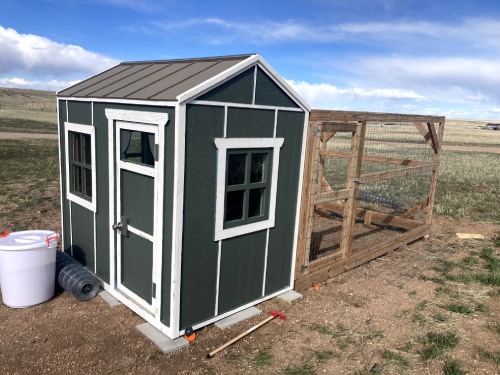
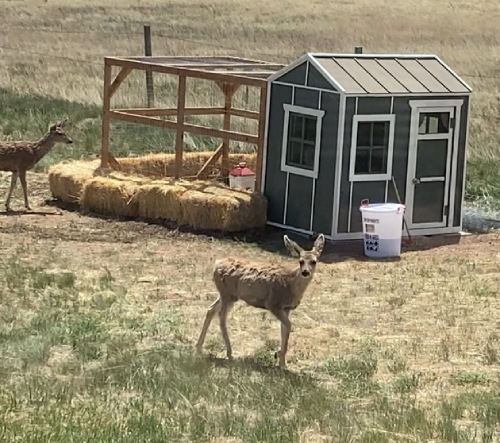
Wyoming wind is not forgiving of shoddy construction work. I enjoy having chickens but didn’t see it being worth it if it would be too expensive. Thankfully, I found this insulated playhouse on craigslist for $350. We were able to build the chicken run for around another $350.
If you’d like to build a chicken coop run like ours, here are instructions. Since we were building to fit the playhouse, your measurements may be different.
Materials List:
This post contains affiliate links.
- 2x6x10 treated boards: 2 pieces
- 2x6x8 treated boards: 2 pieces
- 2x4x10 treated boards: 2 pieces
- 2x4x8 treated boards: 16 pieces
- 4 Anchors
- Pocket-hole jig
- Screws
- Hinges and latch for the door
- Welded wire fencing
- Poultry staples
- Drill
- Wire-cutters or pliers to cut fencing
- Saw
- Measuring tape
- Level
- Construction square
- Hammer
Length: 10 feet
Width: 6 feet 4 inches
Height: 5 feet 4 inches
Door Opening: 2 feet 6 inches wide, 4 feet 7 1/2 inches tall
Step 1: Build the Base Frame
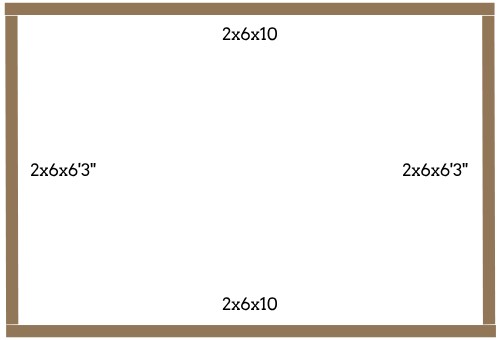
- Cut the 2x6x8 boards to 6 feet 3 1/2 inches in length. These will be the short sides of the base.
- Lay the two 2x6x10 boards parallel to each other 6 feet 3 1/2 inches apart.
- Attach the 2x6x8 boards (cut to 6 feet 3 1/2 inches) to the ends of the 2x6x10 boards, forming a rectangular base (10 feet by 6 feet 3 1/2 inches). Use a square to check corners, then screw the boards together with the pocket screw template.
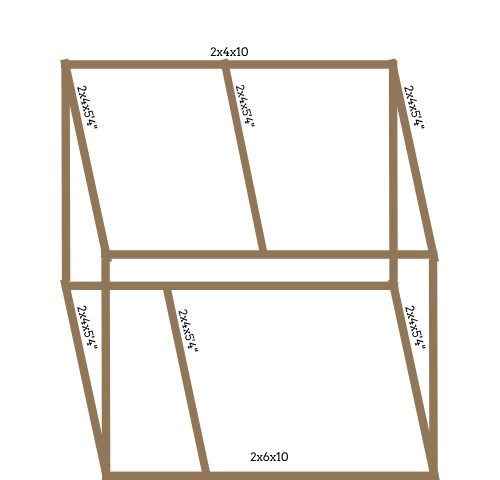
Step 2: Build the Top Frame

- Lay the two 2x4x10 boards parallel to each other 6 feet 3 1/2 inches apart.
- Cut two 2x4x8 boards to 6 feet 3 1/2 inches.
- Attach the cut 2x4x8 boards to the ends of the 2x4x10 boards, forming another rectangular frame (10 feet by 6 feet 3 1/2 inches). This will be the top frame.
Step 3: Attach Vertical Supports
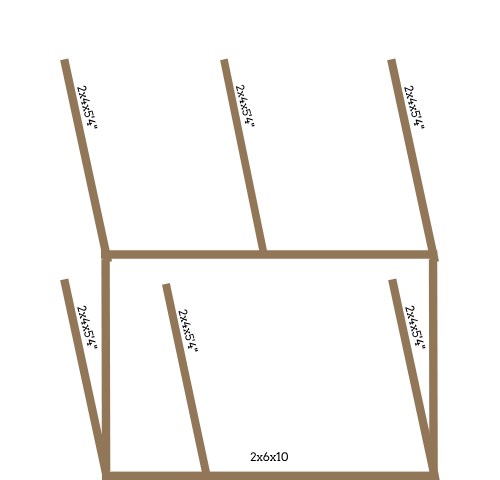
- Cut 6 pieces of the 2x4x8 boards to 4 feet and 7 1/2 inches in length. These will be the vertical supports.
- Attach four of these vertical supports to the inside corners of the base frame, securing them with pocket screws.
- Attach one of the remaining vertical supports at the midpoint of the longer side of the frame using the pocket screw template.
- Attach the last vertical support 2 feet and 6 inches to the right of the other long side’s corner post. This is where the door will latch.
Step 4: Install the Top Frame
- Lift the top frame and position it on top of the vertical supports.
- Secure the top frame to the vertical supports using pocket screws, ensuring the structure is level and square.
Step 5: Add Horizontal Supports
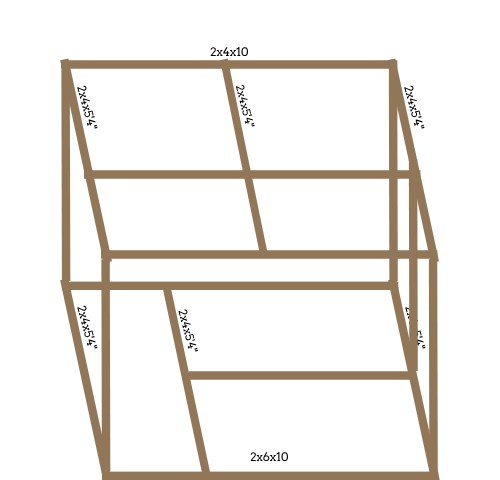
- Cut four 2x4x8 boards to fit between the vertical posts on the three sides that aren’t touching the hen house.
- Place the supports at the middle height of the structure. Attach these supports with pocket screws to add stability.
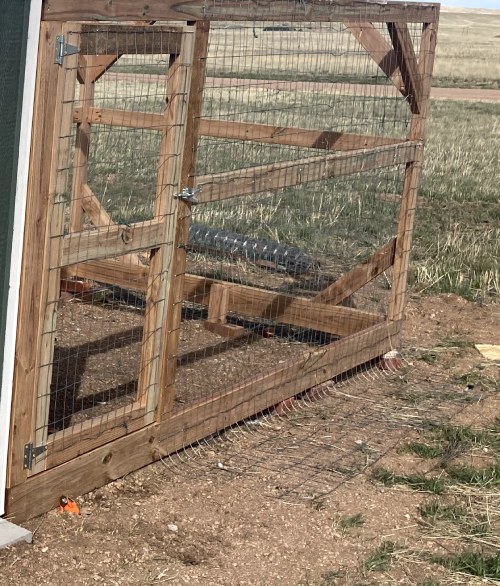
Step 6: Construct the Door
- Cut two 2x4x8 boards to 4 feet 7 inches. Make three more pieces that measure 22 3/4 inches.
- Assemble these into a rectangle using pocket screws, with the shorter pieces on the top and bottom.
- Attach horizontal bracing inside the rectangle to add strength to the door.
- Attach the hinges to one side of the door and the latch to the opposite side.
- Attach the door to the frame using the hinges. Ensure the door swings freely and securely closes with the latch.
Step 7: Corner Bracing
Use scrap pieces to make corner bracing.
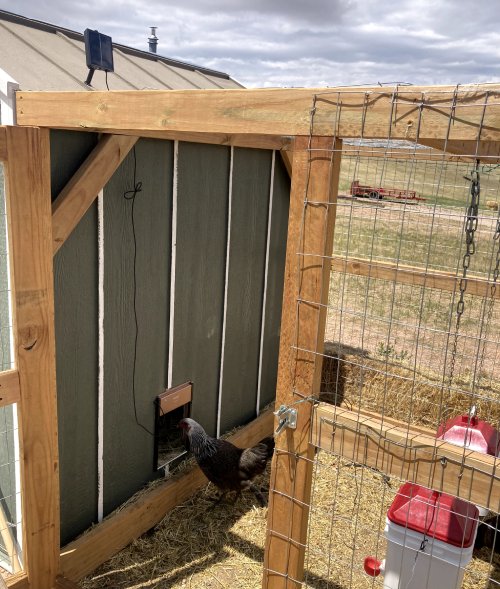
We have an automatic solar-powered door installed on our chicken coop. It isn’t perfect, but it is definitely convenient.
Step 8: Attach the Fencing
- We added two 5′ 11 1/4″ boards to the top for attaching fencing to the roof. Our feeder and waterer hang from one.
- Starting at the top frame, unroll the fencing and attach it to the frame using poultry staples, ensuring it is taut and secure. We extended the fencing out a foot and a half or so to prevent predators from digging in.
- Continue attaching the fencing around the sides, cutting to fit as needed, and overlapping where necessary.
- Attach fencing to the door, ensuring it is secure and leaves no gaps.
Step 9: Anchors

Be sure to anchor your coop properly! The wind pushed our coop and run back a whole foot before we were able to anchor it down.
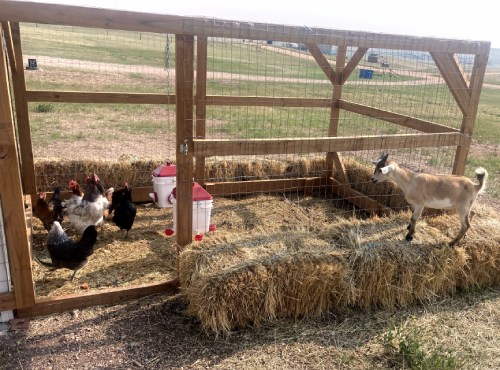
Completed Chicken Run:
- Base Frame: 2×6 boards (10′ by 6′ 4″)
- Top Frame: 2×4 boards (10′ by 6′ 4″)
- Vertical Supports: 2×4 boards (4′ and 7 1/2″ tall)
- Horizontal Supports: 2×4 boards (cut to width)
- Door Frame: 2×4 boards (2′ 6″ by 4′ 7″)
- Door: 2×4 boards (2′ 6″ by 4′ 7 1/2″)
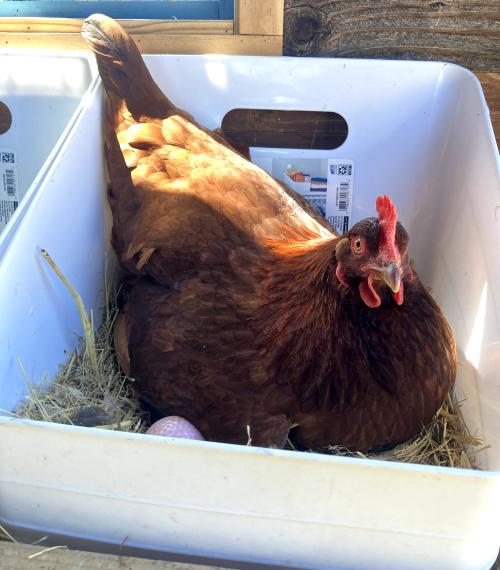
Cheap Nesting Boxes
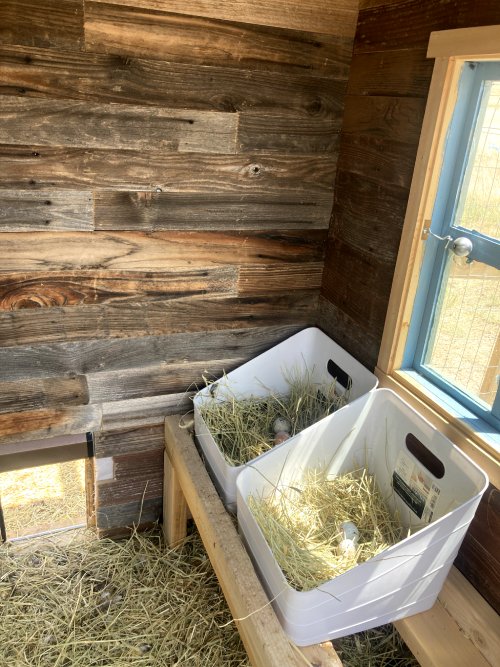
We used $6 closet organizer bins for nesting boxes.
Thankfully, we’re getting enough eggs from our six hens to put some in the freezer for later. It’s a nice way to repurpose glass food jars. I just crack 4-6 eggs into a labeled jar.
We got free bedding from a local farmer who was giving away imperfect hay. Bales put around the chicken run provided the hens with a little wind protection.
I haven’t yet decided how we will keep water unfrozen this winter. We will probably have a battery powering a heated waterer. Leave a comment if you have any suggestions!


Leave a comment